One of the common discussions on our printer forum is in regard to the “waste tank” that lies within many inkjet printers. These “tanks” are actually just ink pads that absorb and then become saturated with ink. There are a few ways ink becomes deposited on these pads including overspray during borderless printing, printing when paper jams, etc. Usually the vast majority of ink is from the cleaning cycles when the printer literally sucks ink from the nozzles of the printhead. You can imagine that after lots of print cycles quite a bit of ink is left inside the printer. One of two things ends up happening:
- Your printer throws an error telling you your waste tank is full
- You end up with a black gooey mess leaking from beneath your printer
A wonderful member of our community, ghwellsjr, shared his experience in dealing with this problem. I was so impressed with the detail of the images and information that I asked if I could share it on the site and he acquiesced. 🙂
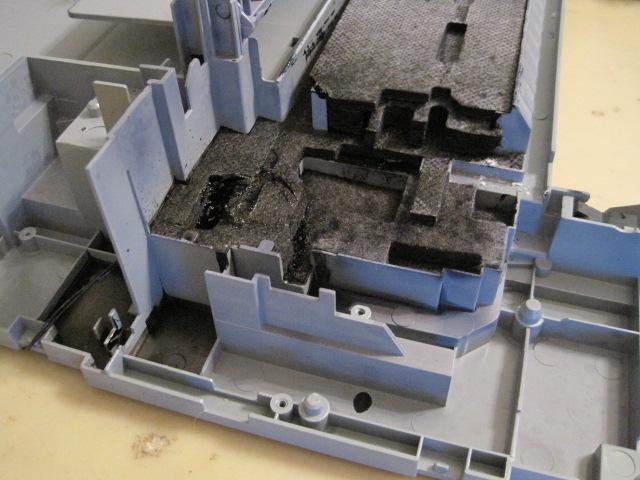
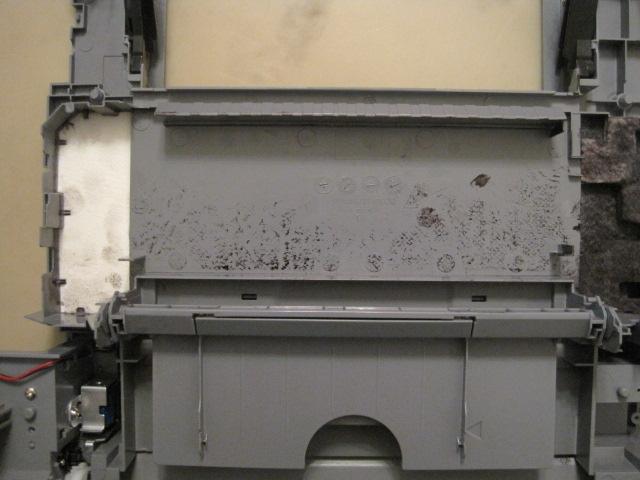
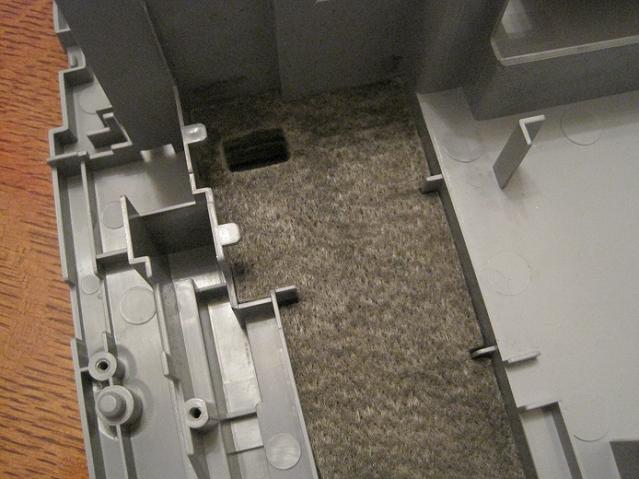
” I recently took apart a Canon MP780 and MP760 to see what the waste ink pads looked like. This post shows what you can only see if you take one of these printers completely apart, that is, you have to take off both side panels, the scanner, the top of the printer and finally the entire printer mechanism plus the electronics board. Here is what the MP780 looked like:

In the above view, the front of the printer is at the bottom of the picture. This printer did not have many borderless photos printed on it because the wide pad is almost devoid of ink. The stain at the left is from the small waste unit that you can see when you look inside one of these printers off to the left. The black area to the right is just below where the purge pump resides. This area will be shown in detail later.
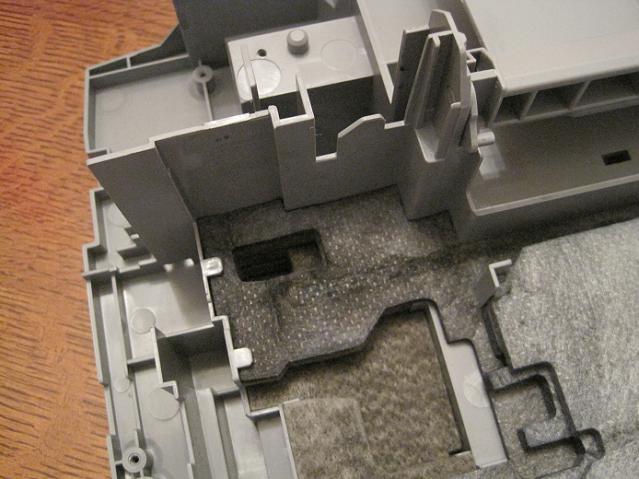
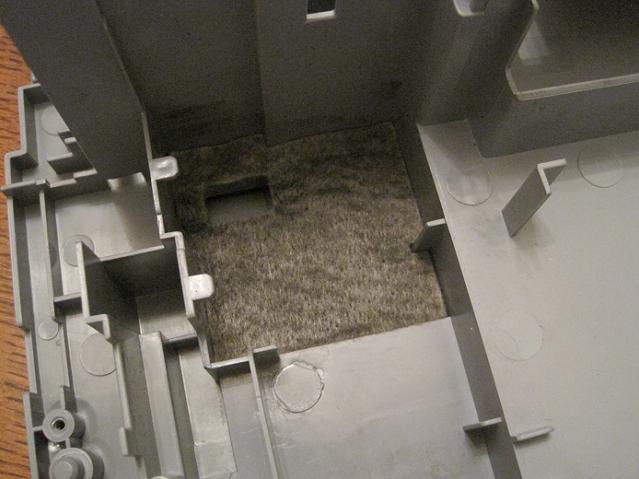
Removing the top waste ink pad we can see the pad below it:
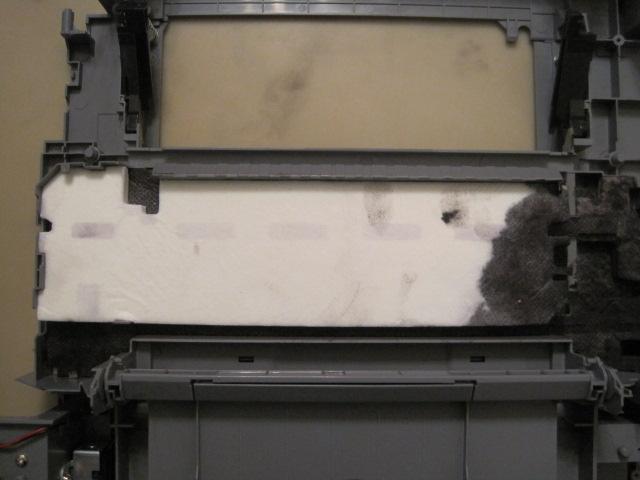
Notice that the right side of this pad has soaked up ink from the pad below it which is shown here:
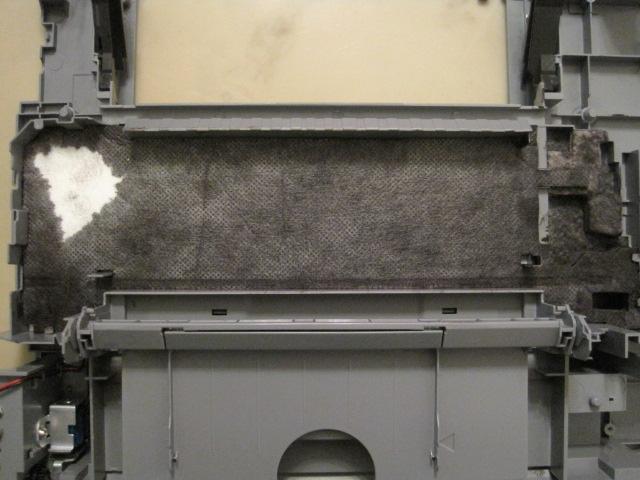
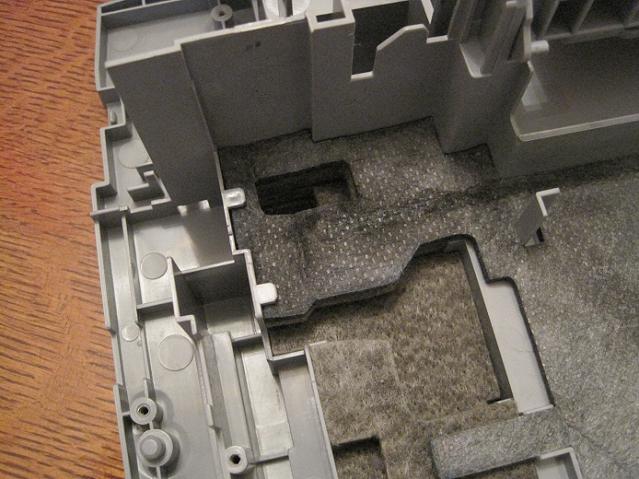
Notice how the pad (above) extends on the left toward the front of the printer and on the right with two small pieces which actually soak up ink from the pads below it:
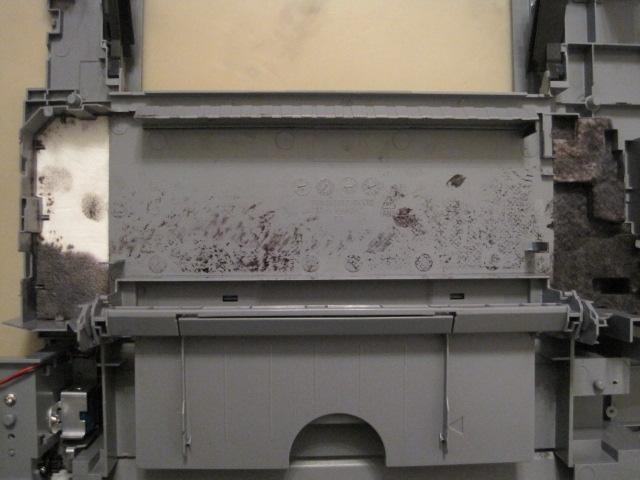
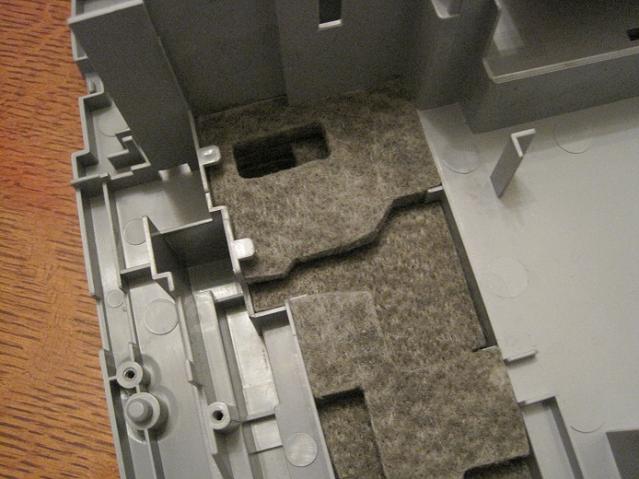
Note that the pads on the right supply ink to the pad above it which transfers the waste ink all the way across it to the pad on the left. The pads on the right will be shown in detail from another view but here is what we see when we remove the smaller pad on the left:
This pad has not soaked up any ink yet and there is another identical one beneath it. In all, there are three identically shaped pads on the left.
Now we turn our attention to the pads on the right, the ones that are below the purge pump as viewed from the right of the printer. These pictures are from the MP760 which had gone beyond 100% full:

In the above image, we can see how completely saturated all the pads under the purge pump were and how the ink overflowed the plastic barriers and stained the plastic base outside the area of the pads. There are two tubes (one for pigment ink and one for dye ink) coming out of the bottom of the purge pump that go into the small rectangular black hole near the left most edge of the pads in the above picture. That hole was full of thick black ink. The remaining pictures were taken after the waste ink pads were removed, cleaned and replaced in the printer base. We start with the same area but looking down:
Note in the above image that the top two pads (on the right) do not extend over any of the pads on the left. Next we remove those top two pads:
Notice the small section of pad just to the left of the right-angle piece sticking up in this pad. All the ink deposited from the purge pump must pass through this small area on its way to the larger pads.
Now we remove the widest pad and see:
These two top pads have strange shapes to fit the purge pump and the other mechanisms inside the printer where the print head parks and other maintenance on the print head is done.
Removing these two pads we have:
And underneath that we see the lowest and last pad:
And underneath the last pad we see some strange compartments:
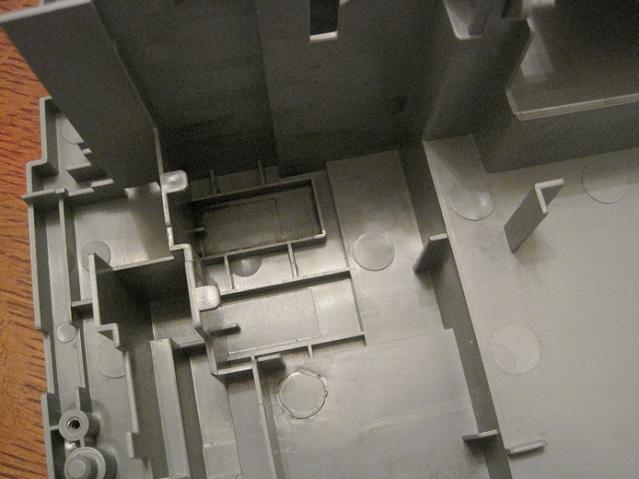
The small rectangular trough at the top of this image is where the purge pump deposits the ink. It doesn’t immediately contact the bottom pad until it has formed a shallow pool. I don’t know why it is designed like this but in the MP780, there was no residual ink in this trough so somehow it got soaked up into the pads.”
Thanks again to ghwellsjr, for such great information and pictures! If you have questions or comments about this great information and process please post them here.
Thanks very much fot the info. I plan on working on my canon I850 printer’s ( two out of commission) and I have a few question How did you clean the pads? Did your reassembly and did they work?
I have two inkjet printers and I didn’t even notice that they have these pads. Honestly, I haven’t used them enough that I have to worry about cleaning them but at least I know now what I’ll have to do eventually. Thanks for the pointers!
Hi, Thank you so much for posting these photos. I got the 5200 error last week and decided I needed a big project for the weekend to relax my mind. I was also hoping that my 13 year old would engage and discover how cool it is to pull things apart (though, slightly less cool while your mom reminds you not to try this your good stuff).
After an enthusiastic start, I had a small pile of screws and decided to look for the instructional YouTube video. I had no idea how to take apart my MP530. No luck.. no blogs.. no tech support from Cannon. Yikes.
Armed with my sense of humor, I continued tearing down the machine. This was not easy to do. I would love to know if the instructions are online somewhere.
I stopped when actually cracking the plastic would be required.
I finally decided, just for fun, to see what a new printer would cost. I got lucky. There was a email “only today” deal at a big box that was pretty epic. I bought it just before they ran out. It has it’s perks: It is wireless and in the MG class, but it has no where near the “heft” of the old machine in terms of specifications.
I am going to put the machine together again. And I am going to reset the waste ink “counter” and live dangerously. The new machine is all I need but I am going miss my old one.
Thanks again for the great photos.
What would be the best way to clean the ink pads?
If they are not cleanable then would you know where to buy new ones?
What would be the best way to clean the ink pads?
Where can I go to buy new ones?