
I’ve been SUPER happy with my Hyundai Elantra. I can’t believe it’s been over 12 years since I did my geeky car purchase calculations and bought it new!
Unfortunately over the past year I’ve noticed that it’s been harder and harder to unlock my car and disengage the alarm using both of my keyless remote FOB’s. At first I thought my batteries were dead. After a handful of futile attempts at replacing the battery, I realized there was another problem and I needed at least one replacement FOB.
I called the local Hyundai dealers and all of them wanted $180+ for a new remote and to also program it! I can get the units on eBay for $40, but I still have to pay the dealer $90 to program it. Yes, I know you can program these yourself. I’ve purchased and programmed these keyless remotes for other cars, but in all my research I discovered that for a handful of reasons, doing so with the Hyundai was a total pain. I figured I’d just eat the expense and get a new one from the dealer.
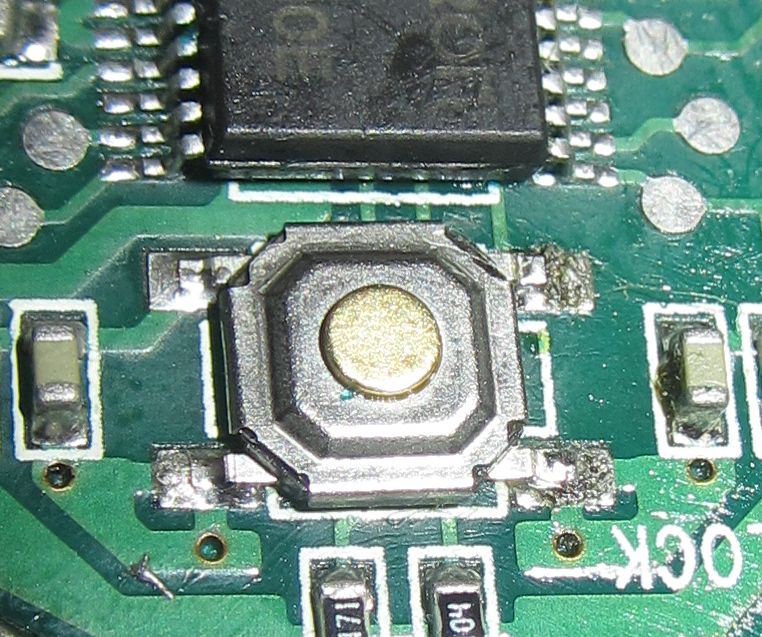
Well, since I’d be getting a new one, I might as well open up one of the ones I had and see what was going on. I disassembled the keyless remote and discovered that the super tiny SMT (Surface-mount technology) switch was no longer working. The little button on the switch wouldn’t depress at all.
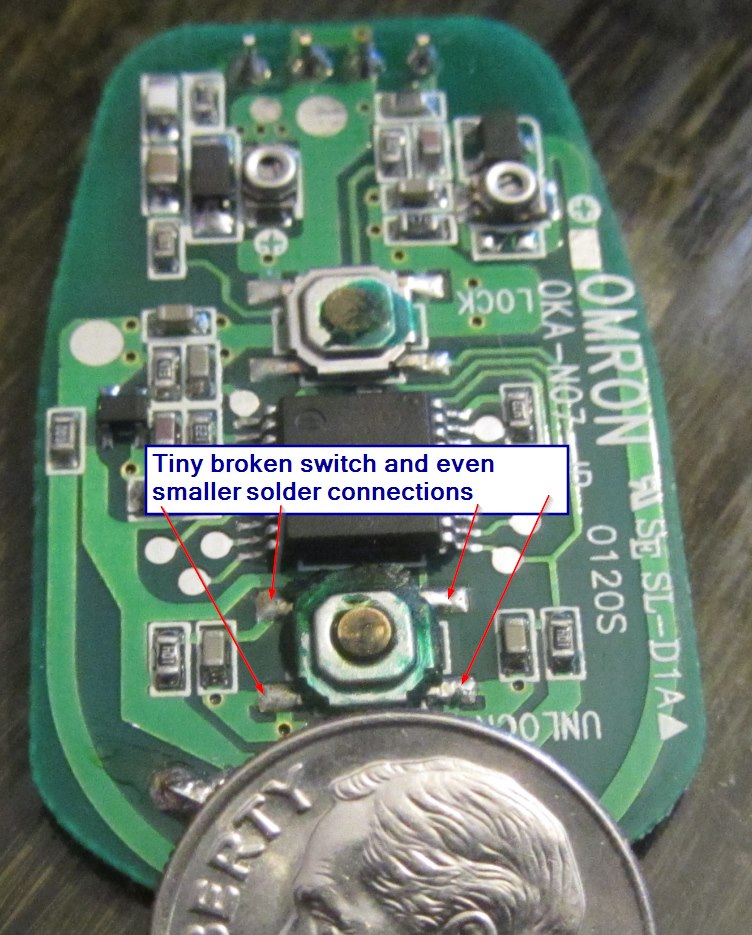 Could it really be just this tiny little switch that is keeping both of my $180 remotes from working? I’ve been so crazy busy over the last 4-5 years that I haven’t done much of any electric work or soldering. The thought of fixing this itty bitty switch was just too exciting to pass up (click the picture to the left with a dime for size reference).
I went to Fry’s Electronics & Radio Shack and neither had a switch even remotely close to being small enough. So, I do as I usually do in these cases… rush home to ebay! I was surprised that within 8 minutes of typing in “SMT Switch” into my search I found an absolutely EXACT replacement! I got 5 (yes FIVE) “”Tactile Push Button Switch Momentary Tact 4x4x1.5mm 4-pin SMD Surface Mount” of these from china for $0.99 + $1.50 shipping. Can you believe it… five of these shipped from China for $2.49… CRAZY!
I’ve never been great at soldering regular stuff let alone super tiny micro switches. Compounding the problem, I don’t have a very steady hand. How in the world would I be able to remove the soldered switch and replace it with a new switch without damaging all the other stuff on the PCB?
I did what I always do in this case and went to YouTube! Here is a great video I found on desoldering and soldering tiny SMT parts.
Did I mention how small these switches are (next to a quarter)?

I was in the mood to do this right, so I went shopping and got a few extra bits:
- KESTER951 no clean liquid flux – Used to clean the parts and help ensure good thermal transfer while removing and adding the switches)
- Illuminated Multipower LED Binohead Magnifier – Totally geeky, but I was amazed at how necessary it was when looking at these super small parts.
- Push button vacuum solder removing tool – Ok, I already had this part as well as my soldering iron
When I finally had everything together I got to work! My plan was to practice on some old computer cards (network adapters) that I had kicking around. I worked on them in an attempt to hone my soldering skills, but my impatience got the best of me. I hate to admit it, but I’ve really screwed stuff like this up in the past by being impatient. I quickly learned that I wasn’t going to become a small solder master any time soon, but more importantly I learned that I could possible use my tiny soldering snips to just remove the leads to the switch!
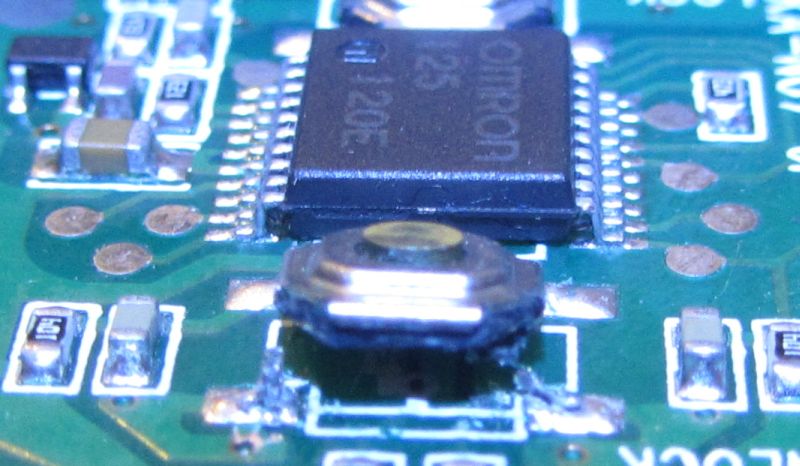
First I cleaned off the switch using the liquid flux and a toothbrush. I’m REALLY glad I did this since there was some green gunk all over the switch… possibly some kind of greese for the switch put on at the factory?
With my super geekly LED head magnifier on I slightly pried the switch up a super tiny amount using a sharp soldering pick tool. It was just enough to get my snip in there to clip the leg. Next I did the other side, and from there I was able to bend the switch up.
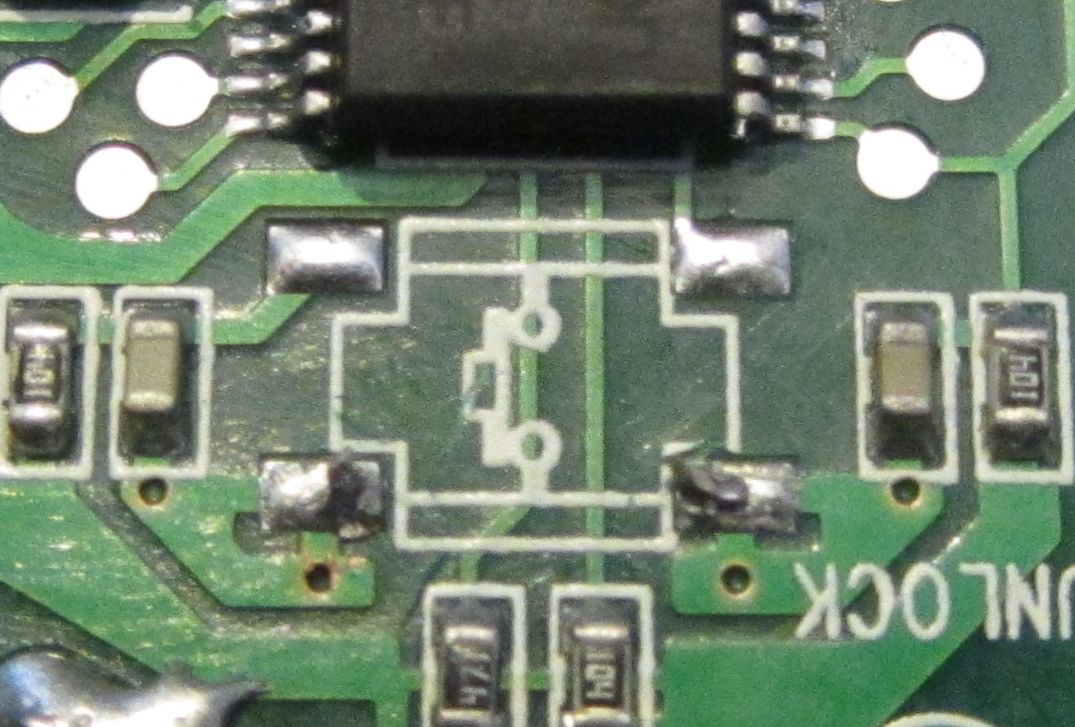
Once I had these two legs detached I thought I’d give removing them a try using the soldering iron… and surprisingly it worked great and I didn’t (at least I believed) fried anything in the process!
Here is the board with the switch removed:
 The next step was to position the new switch and solder it into place. This sounded simple enough, but trying to maneuver this tiny thing into the perfect position proved harder than I expected. Once again I added some flux and after a bit of finagling I was able to get the switch into place.
Using some tape to hold the whole board into place and my finger to hold the switch into place (I figured the threat of burning my finger would help keep my hand a bit more steady with the iron). 🙂 Surprisingly, the legs of the new switch soldered down to the board using the previous switches solder without any problem at all… it was almost too easy!
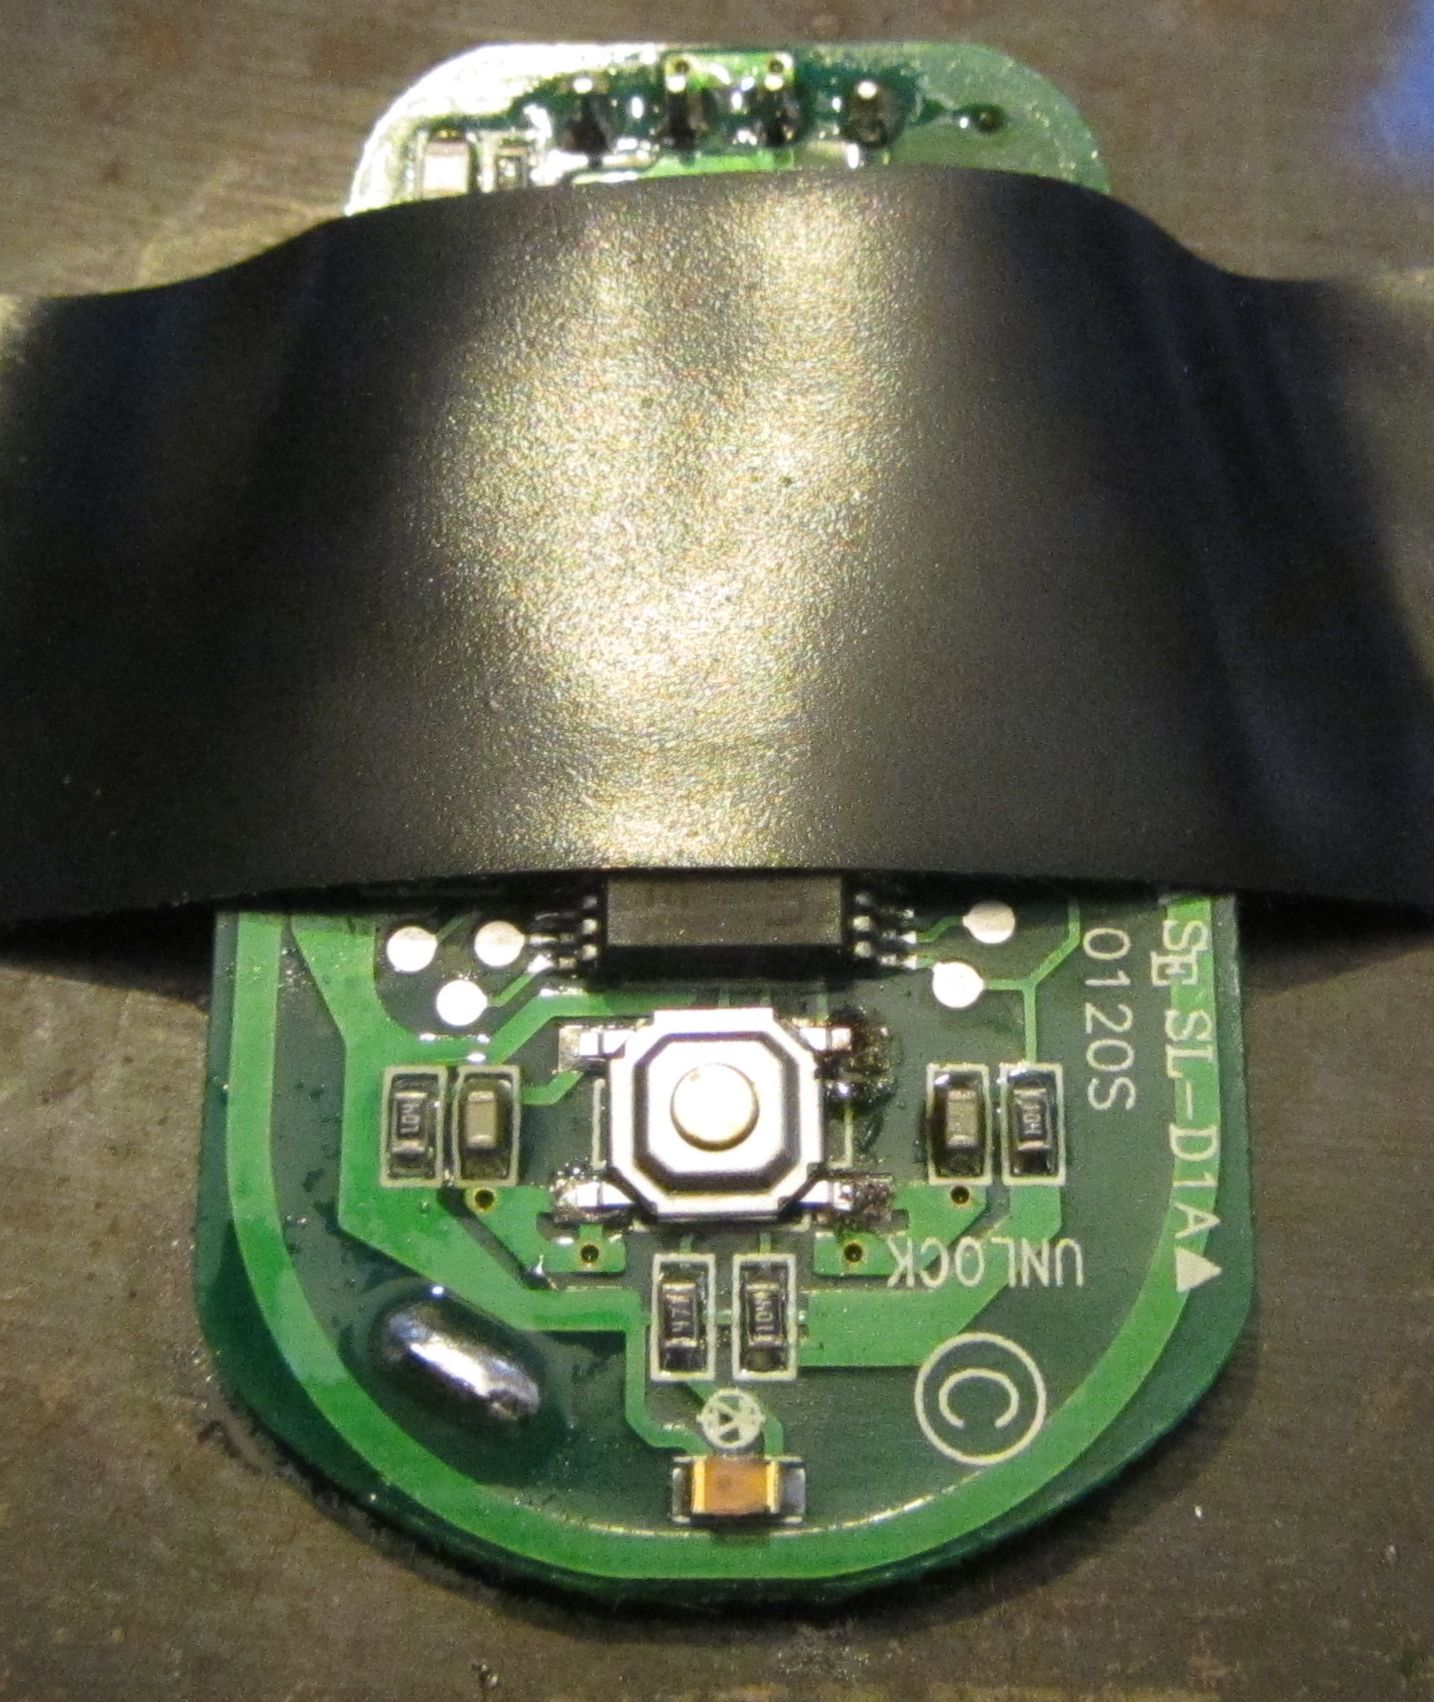
Here are my final results:
I’m VERY pleasantly surprised at how it turned out… especially that I didn’t burn myself or destroy the board in my impatience!!
… of course, none of this matters if the thing doesn’t work. For all I know, any number of things could have gone wrong, including
- Wrong switch type. Just because it looked like a match maybe wouldn’t guarantee the inside circuitry was the same
- Wrong switch orientation
- Overheated the board or neighbor circuits and fried them
- Broke any of the existing circuit paths or possibly made a bridge circuit
- etc.
Almost holding my breath I put everything back together and pushed the button. The super perfect tactile response of the brand new button felt fantastic. The other still functioning original button on the board provided a great contrast between what a new button should feel like! Next it was out to the car for the real test!
It worked PERFECTLY! The car unlocked with such response I almost felt like the clicky clicky of my new button was somehow sending the unlock command faster than the original OEM FOB button! Seriously, I can’t convey how nice the new button feels when depressed. In fact, it felt so nice that I was tempted to pull out the lock button and replace it too! Fortunately my sound mind prevailed and the adage “If it ain’t broke, don’t fix it!” came to mind, so I left it alone!
What I did do to satisfy my craving for more fixin’ was to grab my other remote with it’s crappy unlock button and replace it as well. This one went even smoother and I was able to skip the clipping process and go directly to unsolder all four legs! This left me with an even cleaner surface with which to work!
So, I’m pretty excited and kinda proud of myself for pulling this off. This adventure definitely ended up being way more about the process and the “Hey, I fixed this!” than about the money, and I’m really glad I gave this a go!
Thanks for the article. I wanted to try to fix my wifes remote but had no idea what the switches were called. Ordered mine from Digi Key. We will see how it goes….
I was so so happy to come across your post! My key fob for my 53 mg zr works but the unlock button has dislodged after being soldered on once before by a garage but now it’s disappeared so I’m constantly worrying if my alarm goes off there is no way of stopping it, unfortunately I haven’t got a alarm code or a barcode to programme a new fob so it’s a case of just a new button, didn’t want to ring around garages to be quoted silly money going to follow in your footsteps and give it a go thanks
How much would you charge to fix mine I mail it to you?
RJ, that’s a flattering offer, but I don’t feel confident enough in my skills to attempt it for someone else!
as maticulous are you were… should be a breeze, but I understand. I will try to find a local tv repair guy to do the soldering. ’cause I know ill toast the thing! 🙂 i plan to buy the switch (es) and maybe transplant just the outer switch (mechanical) part onto the soldered on base part. think?
haha… Well, I was pretty dang sure I was going to toast mine as well. Maybe I just got lucky!
Interesting idea to try to replace just the mechanical part. I don’t know if that would work, but I’d love to see / hear about your experimenting with it! Please return and report as you proceed. 🙂
hi friend,
Writing you from Mexico, thanks for this great tutorial, have a Saab key with the same problem so I google and this article pop up. I was searching for key control buttons, or small buttons, never thought to look for switch. Thanks your article found on ebay my buttons and I’m going to replace them as you did so, thanks again!!
My open button was stuck down and constantly causing my car to open. I used to stop it triggering the car by putting it in a faraday cage (aluminium foil). I found this site, bought the switches, and replaced the switch tonight. Open button now works perfectly. Thanks for the advice!
Thanks for your article!
My wife’s 2013 KIA Sorento only came with one remote. It finally died a couple of months ago, but I knew I could find a way around the $180 replacement cost from the dealer, and $120 from a locksmith.
Went to Amazon, found a package of switches for $5, and soldered them up per your instructions. Working great!
That’s awesome! Glad my instructions from so long ago helped! Gotta love the interwebs! 🙂